What it is
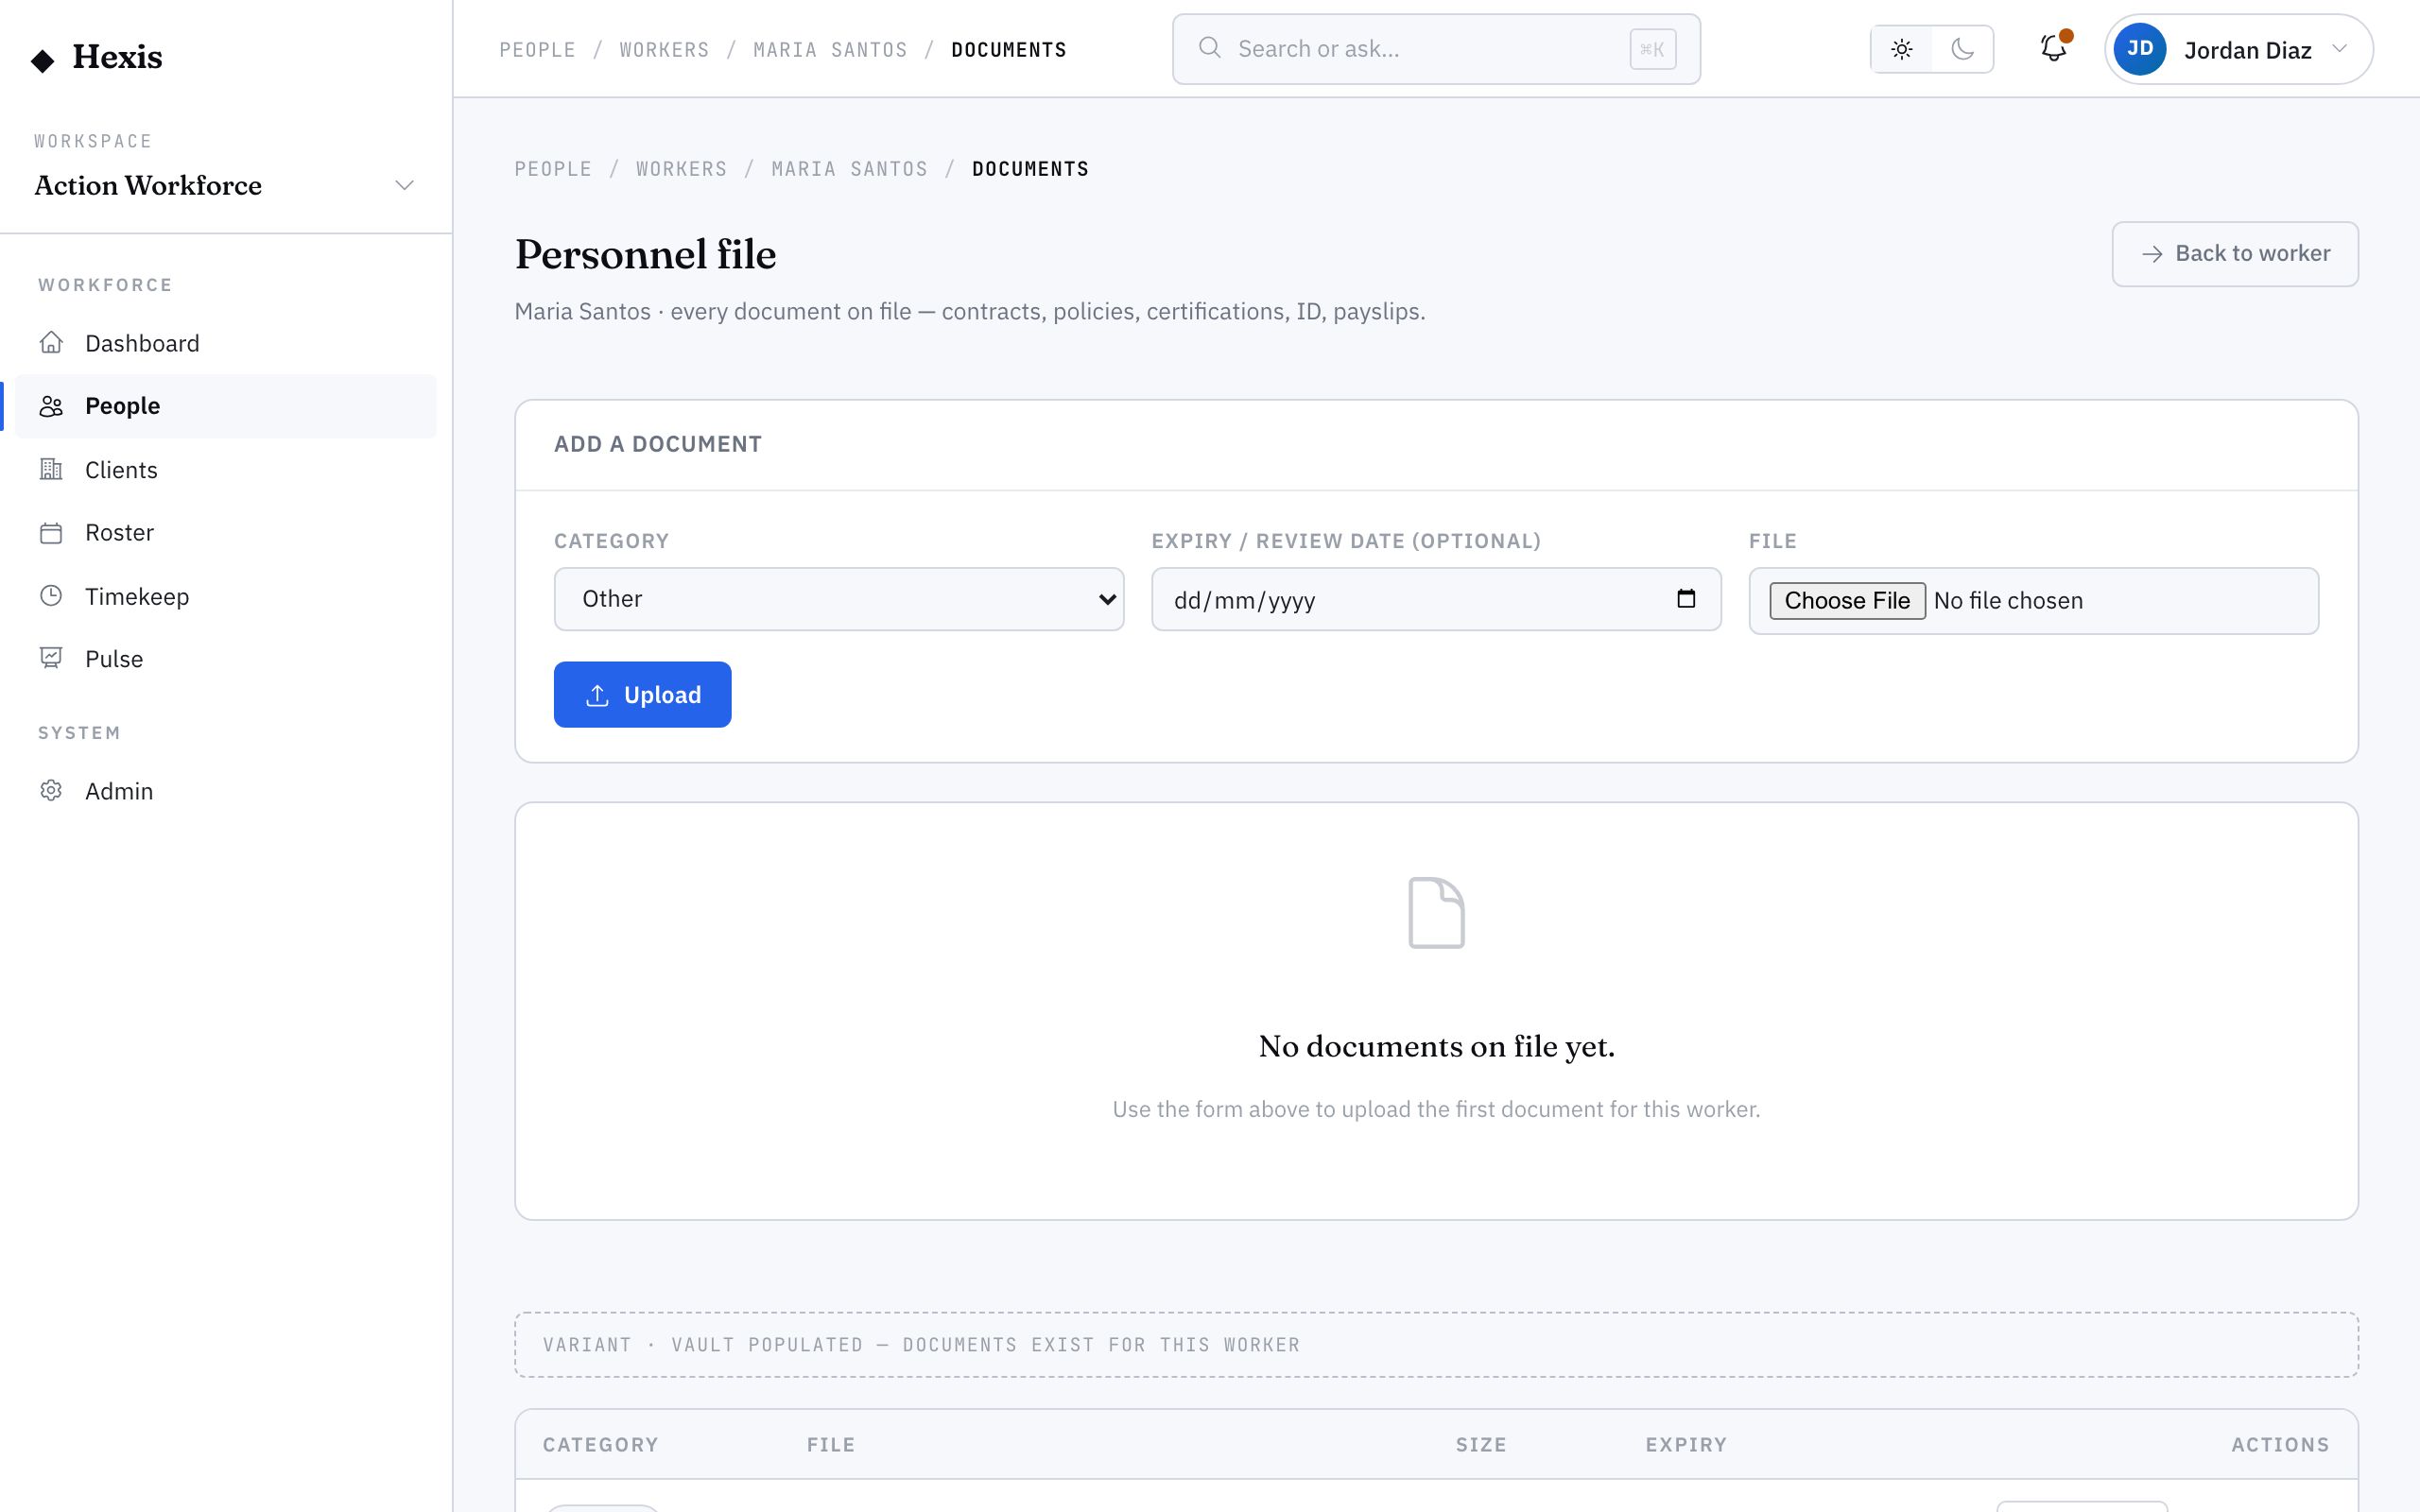
The personnel file is the per-worker document vault — the "show me everything on file for this person" view that used to mean visiting several systems. Contracts, policies, certifications, identity documents, payslips and tax forms all live here, each tagged with a category and, where it matters, a review or expiry date.
It matters because documents drive obligations. A certificate with no recorded expiry is a renewal you’ll miss; a contract that isn’t filed is a dispute you can’t answer. Filing documents against the worker, with categories and dates, turns a folder into a record you can audit and act on.
When to use it
- A signed contract or policy acknowledgement needs filing
- A worker hands in a new certificate or identity document
- You’re checking what’s on file before a review or an audit
- A document is expiring and needs a current version uploaded
- You’re assembling one worker’s complete file in one place
How it works
Step by step.
- 1
Open the worker’s file
From the worker profile, open the personnel file. The header confirms whose documents you’re looking at, with a link back to the profile.
- 2
Upload a document
Use the always-visible upload card: pick a file, choose a category and add a review or expiry date where one applies. Supported formats and a size limit keep files sensible.
- 3
Categorise it
Set the category — contract, policy, certification, identity, payslip, tax or other — so the document files under the right retention class and is easy to find later.
- 4
Set the expiry
For anything that lapses, add the expiry or review date. The file flags it as it approaches and again once it’s past.
- 5
Review the on-file list
The list shows every document with its category badge, size and expiry marker, so you can confirm the file is complete and current.
Worked example
Follow it through.
The scenario
Priya Nair, a Care Worker for Brightwater Health, hands in a renewed first-aid certificate valid to 30 Jun next year.
- 1 Open Priya’s profile and go to her personnel file.
- 2 In the upload card, choose the certificate file.
- 3 Set Category to Certification.
- 4 Set the expiry date to 30 Jun next year.
- 5 Upload, then confirm the new certificate appears at the top of the list.
The result
The certificate is filed under Certification with a tracked expiry, and the file will flag it well before it lapses.
Tips & notes
Good to know.
- Always set an expiry on certificates and identity documents — an undated certificate is a renewal you won’t be reminded about.
- Expiry badges turn warning-coloured around a month out and error-coloured once past, so you can triage the file at a glance.
- Use the right category — it sets the retention class and keeps the org-wide document register accurate.
- The org-wide document register rolls these up across everyone, so good per-worker filing keeps the whole register honest.
When you’re done
The worker’s file is complete, correctly categorised and tracking every expiry, ready for any review or audit.