What it is
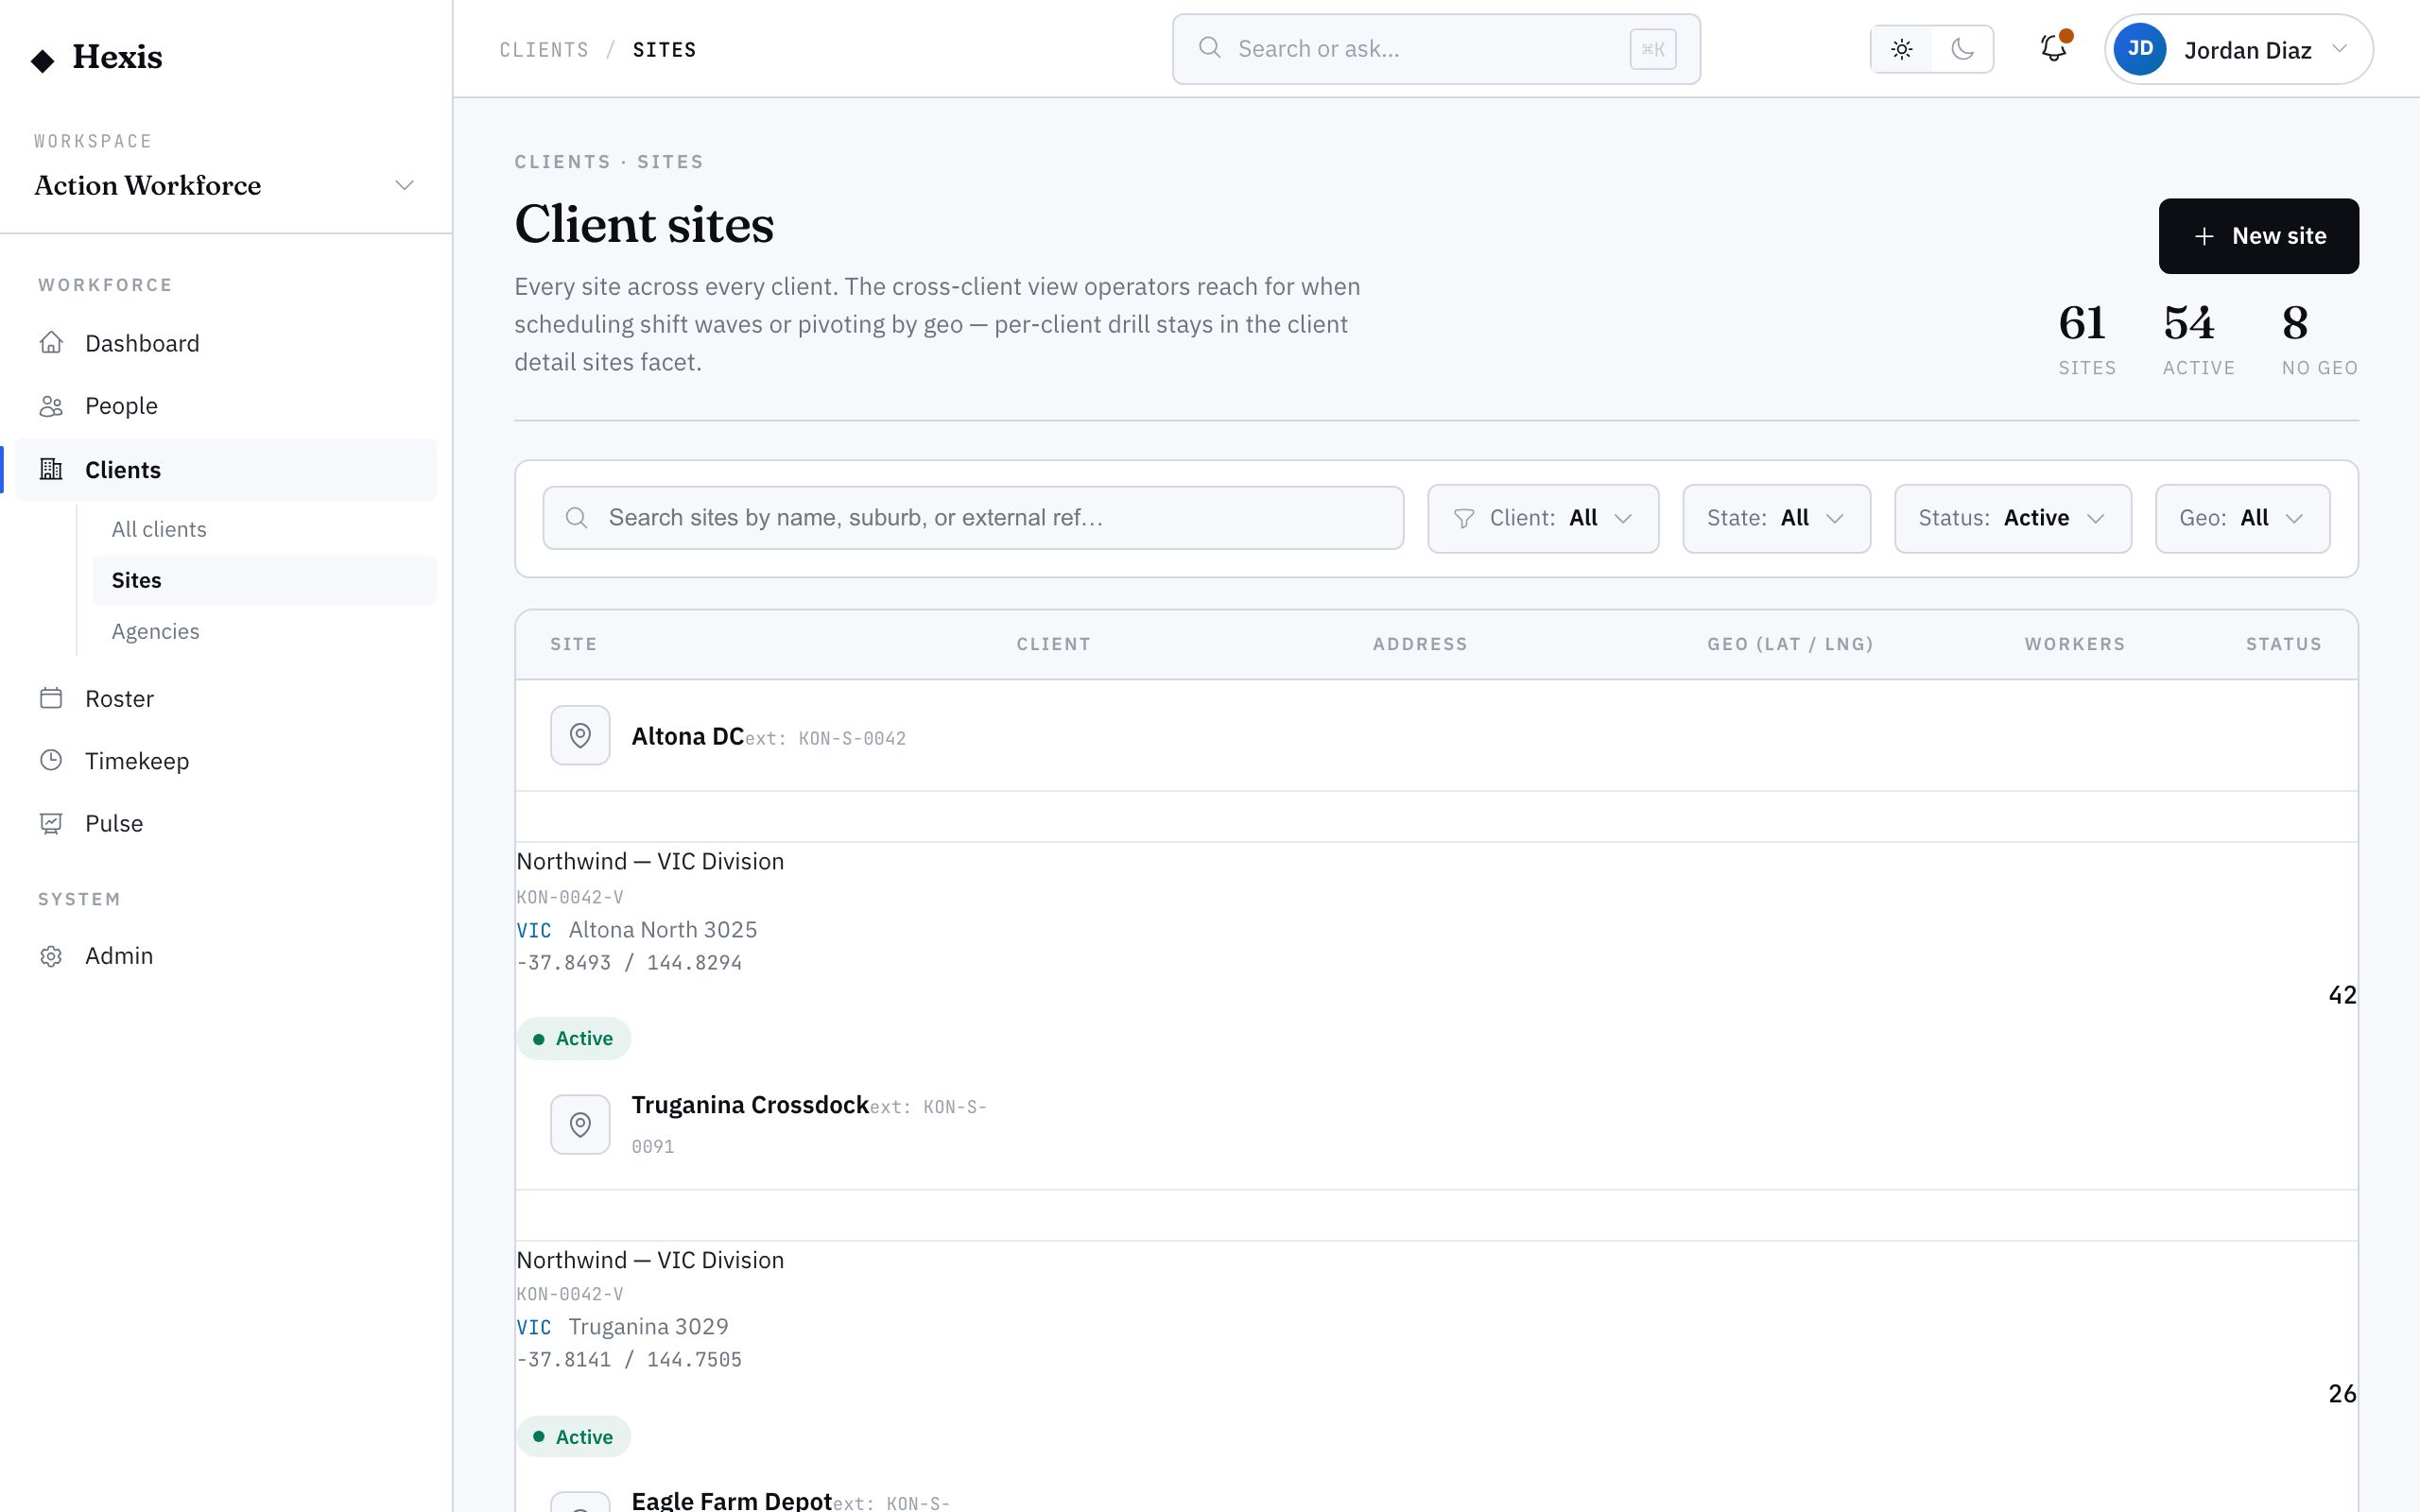
A site is a physical location where your workers turn up — a warehouse, a store, a terminal, a plaza. Each client can have many. The sites view brings every site across every client into one searchable table so you can find, check and tidy locations without hopping between client profiles.
Accurate sites matter because everything operational keys off them: rosters are built per site, travel and geo-fencing rely on the recorded coordinates, and your worker-at-site counts feed reporting. When a client opens a new location or a depot closes, this is where you keep the picture true.
When to use it
- A client has opened a new location you will staff
- You need to confirm a site address or its coordinates before a shift
- You want to see every site missing geo data and fix it
- A location has closed and should be retired
- You are auditing how many workers sit at each site
How it works
Step by step.
- 1
Open the sites view
Go to the sites list to see every site across all clients, with its parent client, city, state and worker count.
- 2
Filter to what you need
Narrow by client, state, status or whether the location has complete coordinates, so you can work through a tidy subset.
- 3
Open the client profile to add or edit
Each row drills into the sites panel on its client profile, where you add a new site or correct an address.
- 4
Record the address and coordinates
Capture the street address, city and state, and set the map coordinates so geo-aware features work for that site.
- 5
Set the status
Mark the site active when it is live, or retire it when the location closes so it drops out of operational views.
Worked example
Follow it through.
The scenario
Coastline Logistics is opening a second depot and you need it ready before Monday’s roster.
- 1 Open the sites view and filter to client Coastline Logistics.
- 2 Confirm the existing Harbour Point Terminal is active.
- 3 Open Coastline’s profile and add a new site, Docklands Distribution Centre.
- 4 Record the address in Port Melbourne and set its coordinates on the map.
- 5 Set the site active.
The result
Docklands Distribution Centre shows as an active Coastline Logistics site with a worker rollup of zero, ready for its first roster.
Tips & notes
Good to know.
- Filter to sites with incomplete coordinates to clear geo gaps in one pass — these are the ones that break travel and check-in features.
- The worker-at-site count is your fastest sense of where staffing is concentrated.
- Retire a site rather than delete it; retiring keeps the history while removing it from live rosters.
- A site sits under exactly one client — for shared locations, model one site per client relationship.
When you’re done
Every client location is recorded with a correct address, coordinates and status, ready for rostering.